Loomly is a social media calendar that helps you easily and efficiently manage your social media content and social media marketing team. You might know Loomly by its former name Calendy also.
With Loomly you can create and schedule content for Facebook, Twitter, Pinterest, Google My Business, LinkedIn, and automated pushing for Facebook and Instagram Ads. Loomly boasts with an intuitive interface and innovative features that will make your life much easier but is it really as good as it claims to be? Will this app finally be the right one for your social media automation needs?
We will review the app’s features, pricing plans and draw a conclusion accordingly. In the end, we will offer a short comparison with Populizr – another publishing automation tool for social media that allows people to manage their social media accounts from one dashboard (you can read more about Populizr’s functionality here).
Let’s start!
Creating An Account
Before you create an account with Loomly, you need to choose which pricing plan to use and the posting frequency (monthly or yearly). If you decide to use a yearly posting frequency, you will get a 25% discount from the start.
Loomly offers 5 pricing plans:
- Base
- The base pricing plan costs $34 per month or $300 per year.
- Only 2 users can get access to the tool.
- Users can manage up to 10 social accounts.
- $500 Loomly ad budget that you can allocate to each post boosted with Facebook.
- Standard
- Pro pricing plan costs $76 per month or $684 per year.
- Only 6 users can get access to this tool.
- The user can manage up to 20 social accounts.
- $1000 Loomly ad budget that you can allocate to each post boosted with Facebook.
- Advanced
- An advanced pricing plan costs $159 per month or $1.428 per year.
- Only 16 users can get access to the tool.
- The user can manage up to 35 social accounts.
- $2.000 Loomly ad budget that you can allocate to each post boosted with Facebook.
- Premium
- The premium pricing plan costs $332 per month or $2.988 per year.
- Only 26 users can get access to the tool.
- The user can manage up to 50 social accounts.
- $5.000 Loomly ad budget that you can allocate to each post boosted with Facebook.
- Enterprise
- You need to contact Loomly to get the price.
- Over 27 users can get access to this tool.
- The user can manage up to 51 social accounts.
- $10.000 Loomly ad budget that you can allocate to each post boosted with Facebook.
With all 5 Loomly pricing plans you get:
- Unlimited calendar templates
- Automated publishing
- Unlimited file uploads
- Unlimited calendars
- Advanced analytics (except with the Base plan)
- Notifications (email, push, Slack, Microsoft Teams)
- Audience targeting
- Approval workflow
- Unlimited posts
- Basic analytics
- Content export (except with the Base plan)
- Live analysis
- Post review
- Post ideas
- Training
- Support
Loomly gives you 15 days free trial before purchasing any of the plans.
Loomly Features
1. Scheduling Posts
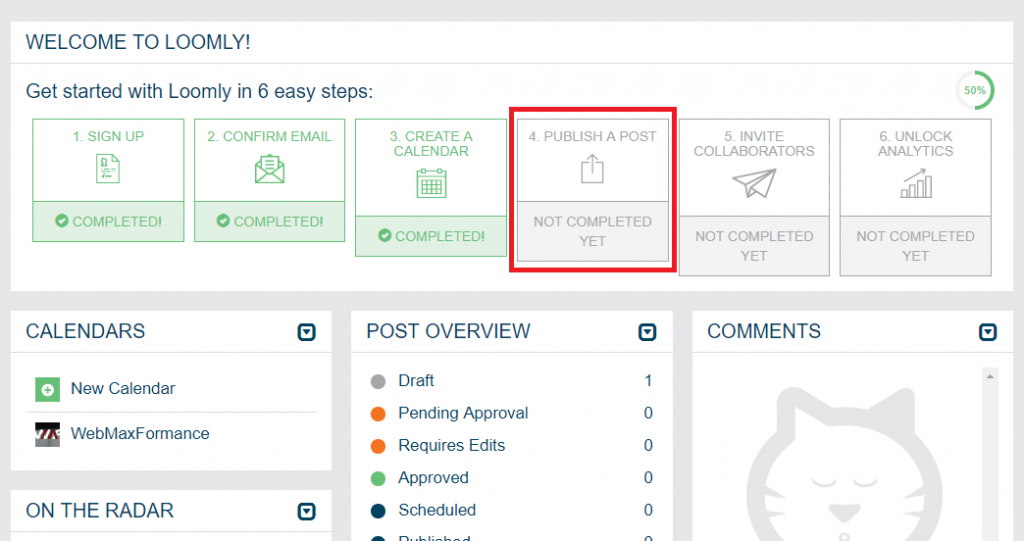
Once you created an account, confirmed your email, and logged in, you can start scheduling posts.
But to schedule a post, you need to create a calendar first.
Follow this step by step guide to learn how to schedule posts:
- Go to your dashboard, and click Create a calendar.

- In the Calendar settings, provide your name, time zone, business industry, and upload your business logo. Then, click Update calendar.

- Once you created the calendar, click Publish a post.
- Now, you are in the Set post details feed, and you are required to set the posting time and provide subject and tags. When you complete this info, click Continue.

- In the next step, select the social networks you want to share your post on. Loomly shares on following social channels:
- Instagram,
- Facebook,
- Pinterest,
- Google My Business
- LinkedIn, and
- Twitter.
When you pick the desired networks, click the Continue button.

- In the Define generic content field, provide your message. You can also give an URL link and shorten it by clicking Shorten URLs button. Next, add an image and a video by uploading them from your computer, or simply browsing your library or importing from URL.
Once you are done, click Continue.

- The next step lets you preview your post. If needed, you can tweak a thing or two to make it just the way you like it. You can also remove the link preview if you decide you don’t need it.

At the bottom of the page, you can see comments for the post you are about to schedule. Now is the time to make some improvements to your text if needed, and once you think your post is ready for scheduling, click Continue.

- In this step, Loomly aks you to choose a target audience. In the Preferred audience field, pick the audience age, gender, interests, relationship status, education status, and location.

You can also choose the minimum age of people who can see your post in the Audience restrictions field.

Lastly, you can promote the post, but before you do that you should connect it to an Ads account.

- Final step gives you 3 options to choose from: update, schedule or publish now.

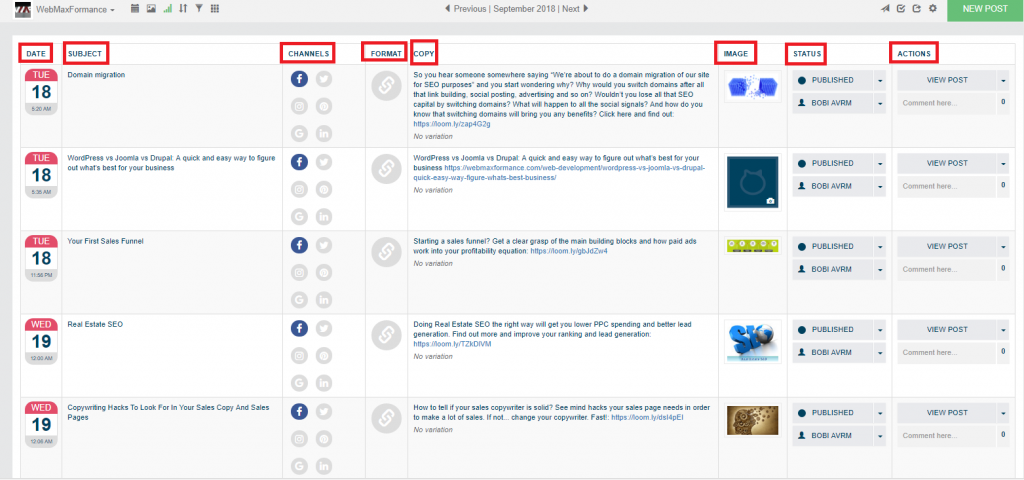
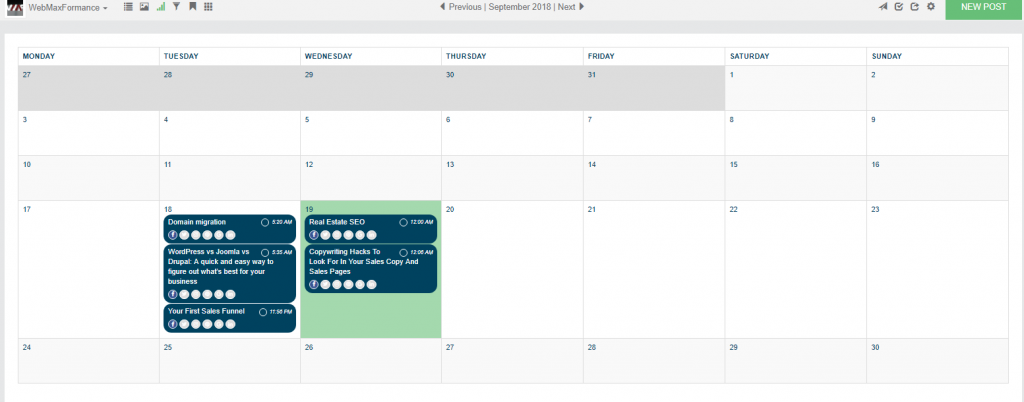
You can see in your calendar all your scheduled and published posts, as well as posts waiting for approval to be published. There are two ways to see the posts: list view and calendar view.
The List view provides all the info about when and where your posts were published. You can see the subject, the copy, the format, the image, and the actions connected to the posts.
While in the Calendar view, you can only see the day and the time of posting as well as the social networks your posts are on.
2. Analytics
Loomly enables you to track the analytics of social media campaigns by a social network, and it measures the following metrics:
- Instagram (likes and comments)
- Facebook (shares, reactions, and comments)
- Pinterest (saves, comments, and likes)
- Google My Business (number of people that call directly and location where they come from)
- LinkedIn (comments and likes)
- Twitter (retweets and likes)
Let’s see how Loomly analytics look like for Facebook.
In the Account preview, Loomly shows you:
- Published posts
- Total likes
- New likes
- Unlikes
- Engaged people
- Total Reach
- Organic
- Paid Reach
- Impressions
- Video views

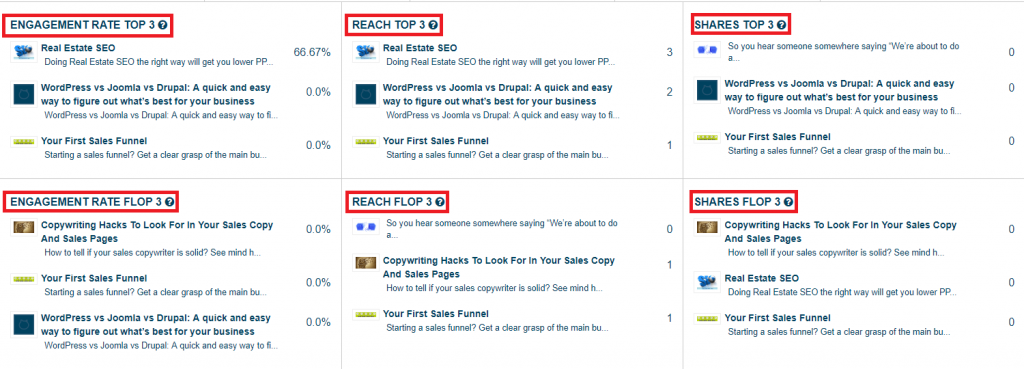
Then it lists the top 3 posts with higher engagement, reach, and shares, as well as the worst 3 performing posts regarding the same metrics.
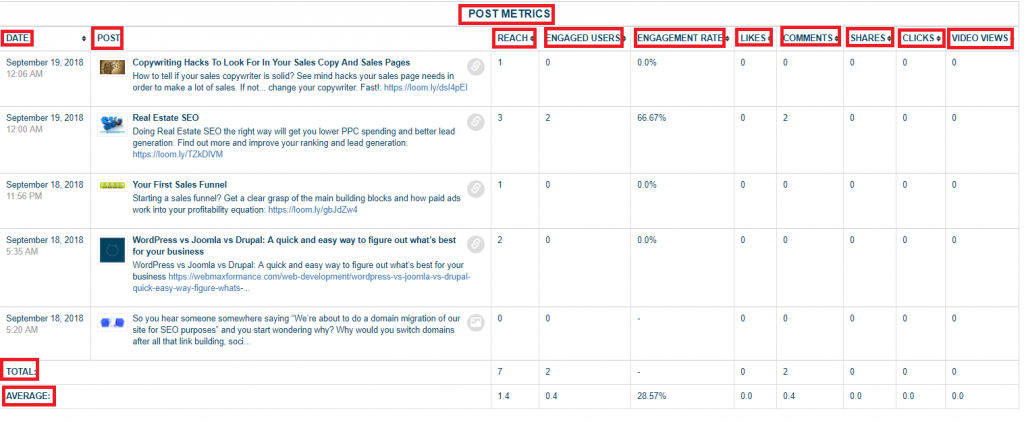
Loomly also provides post metrics such as reach, engaged users, engagement rate, likes, comments, shares, clicks, and video views, as well as the total and the average numbers of these metrics. This info is very useful when it comes to social media marketing.
Loomly Pros And Cons: Comparison With Populizr
Loomly is a social media tool that helps in organizing your social media work in one place. But, is Loomly the right social media management tool for you?
Here’s a comparison between Loomly and Populizr to help you decide which one will suit your needs better:
Features | Loomly | Populizr |
Multi-account management | ⇃ | ⇃ |
Multi-user collaboration | ⇃ | x |
Content management | ⇃ | ⇃ |
Automated publishing | ⇃ | ⇃ |
Post scheduling | ⇃ | ⇃ |
Analytics | ⇃ | ⇃ |
Sentiment and emotion analysis | x | ⇃ |
Creating unique campaign variations | x | ⇃ |
Reusing best performing campaigns | x | ⇃ |
Demographics | x | ⇃ |
Targeting an audience | ⇃ | ⇃ |
As you can see from the table, Populizr doesn’t offer collaboration among users. But it offers much more than Loomly when it comes to effective social media management and marketing. This is where Populizr’s unique features come in extremely handy:
- Creating unique campaign variations – Marketers know how important it is to create social media campaigns. It is the best way to promote your business. However, sharing the same content over and over again on social platforms makes it duplicate content. With Populizr you can create up to 25 unique variations of one single blog post, with a unique title, meta description, and images. In other words, it helps you avoid duplicate content, whereas Loomly doesn’t have anything even remotely similar. It doesn’t focus on effective social media marketing.
- Reusing best performing campaigns – With Populizr you can revive and reuse the best performing social media campaigns. With just a few clicks, you can share old campaigns to attract a new audience.
- Sentiment and emotion analysis – With built-in Sentiment and Emotion Analyzer Populizr measures how effective your content is. So, it makes sure your campaigns trigger the right emotional response even before launching them.
- Demographics – Populizr not only gives you an insight into the number of clicks per social post, but it also tells you which country and city they come from.
To sum up, Loomly is the perfect tool for you if you only look for easier post management. But, if you need a tool that will help you easily manage your social posts, and at the same time contribute to an effective social media marketing, then Populizr is the right choice.
Hopefully, this post will help you decide which of these two tools is the right one for you. Now it’s up to you to decide.
Recent Comments